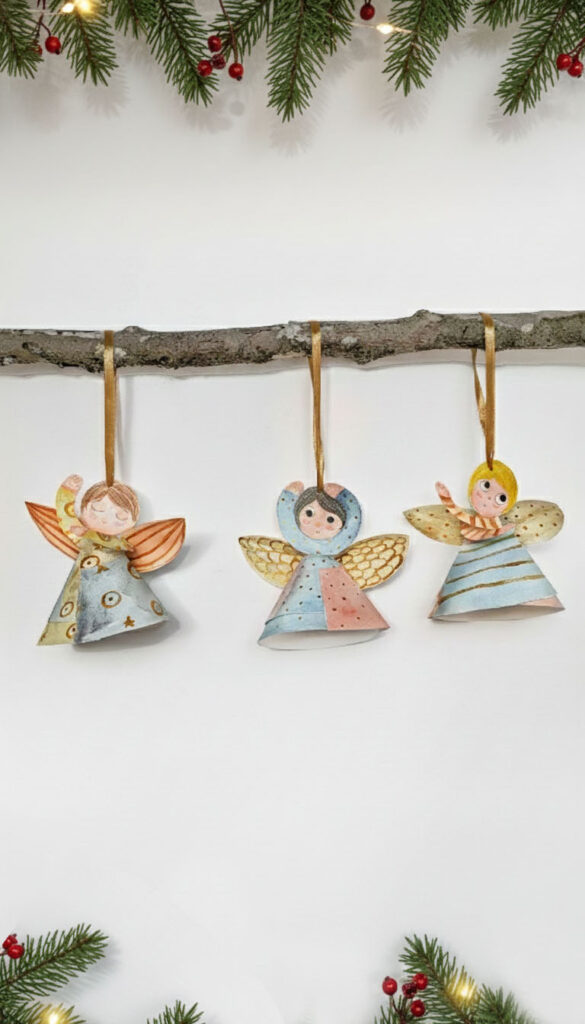
Paper angels are part of many families’ Christmas traditions. They’re simple, light, poetic, and blend beautifully with any festive décor. Here’s a step-by-step DIY so that even complete beginners can create their own personalised Christmas angel. In this tutorial, you’ll find a printable template, clear instructions, and colouring ideas.
All the angels shown in the photos were made using watercolour paper and painted with my own natural pigments. But for this DIY, you won’t need anything complicated: a sheet of paper, coloured pencils (or watercolours) and a pair of scissors are more than enough to turn a rainy afternoon at home into a perfect family activity.
WHAT YOU NEED:
White paper or drawing paper
Colouring materials: coloured pencils, markers, crayons or watercolours
Scissors
Compass
Glue
Hole punch
Ribbon, raffia, or string
Optional: circular craft punch
PRINTABLE TEMPLATE:
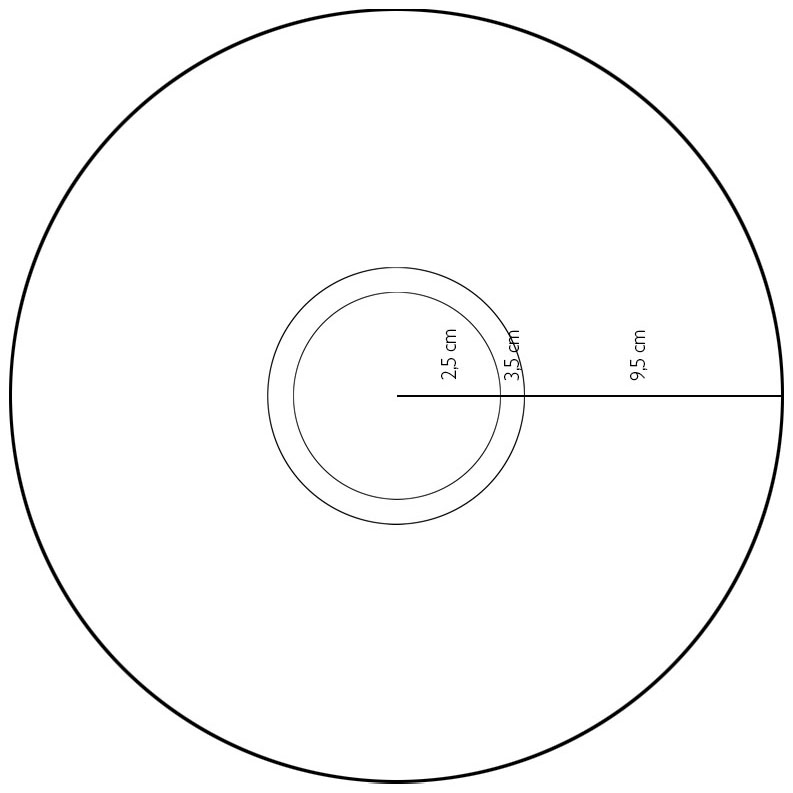
The ready-to-print template (actual size) includes the three circles needed to create the body, arms, and head. The version I designed fits a full A4 sheet.
HOW TO MAKE:
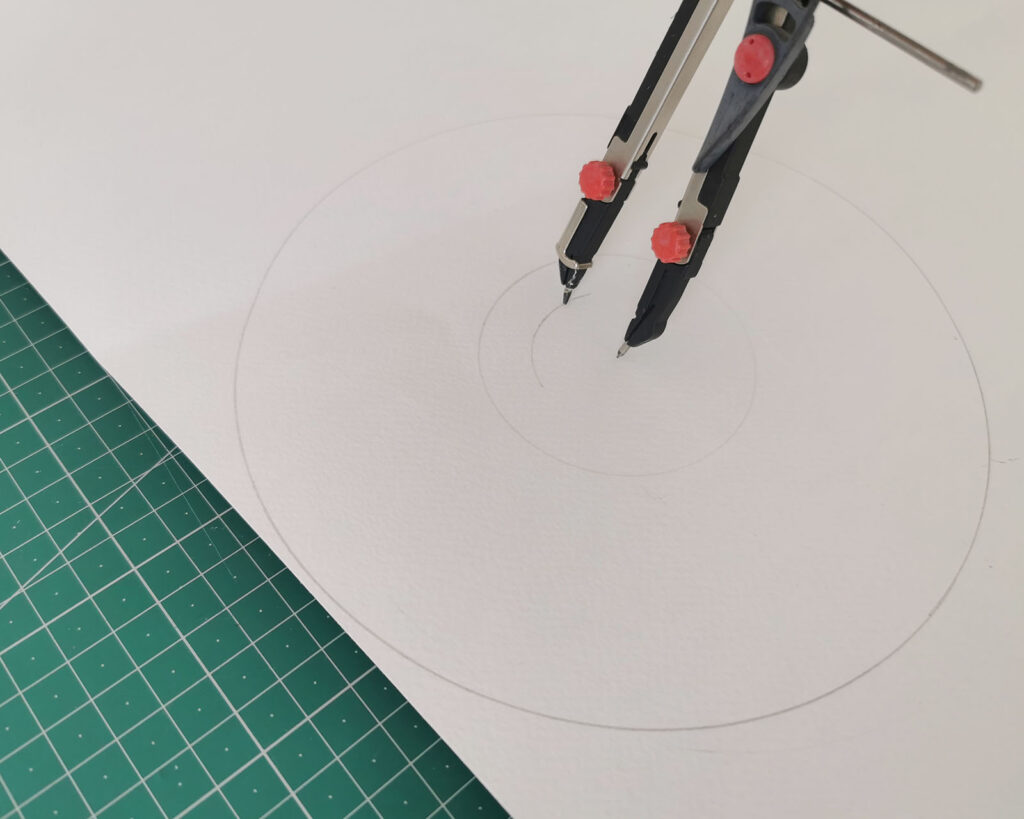
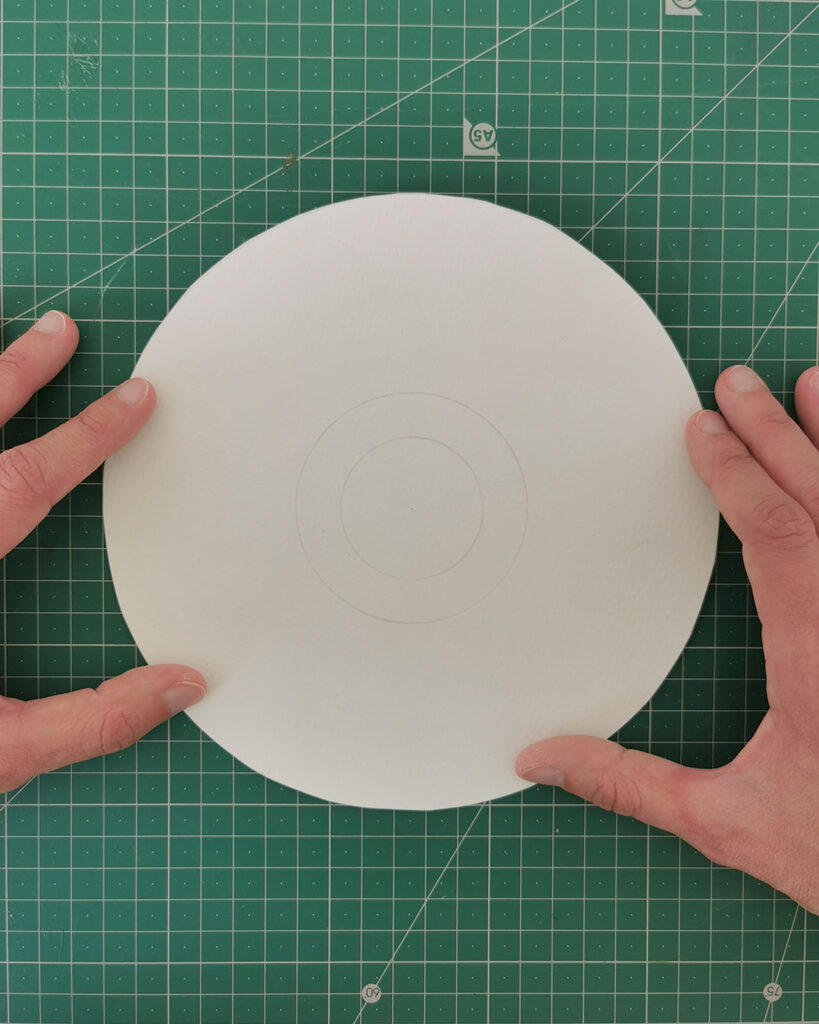
Using a compass, draw three circles with the following radius:
9.5 cm – body / dress
3.5 cm – arms
2.5 cm – head
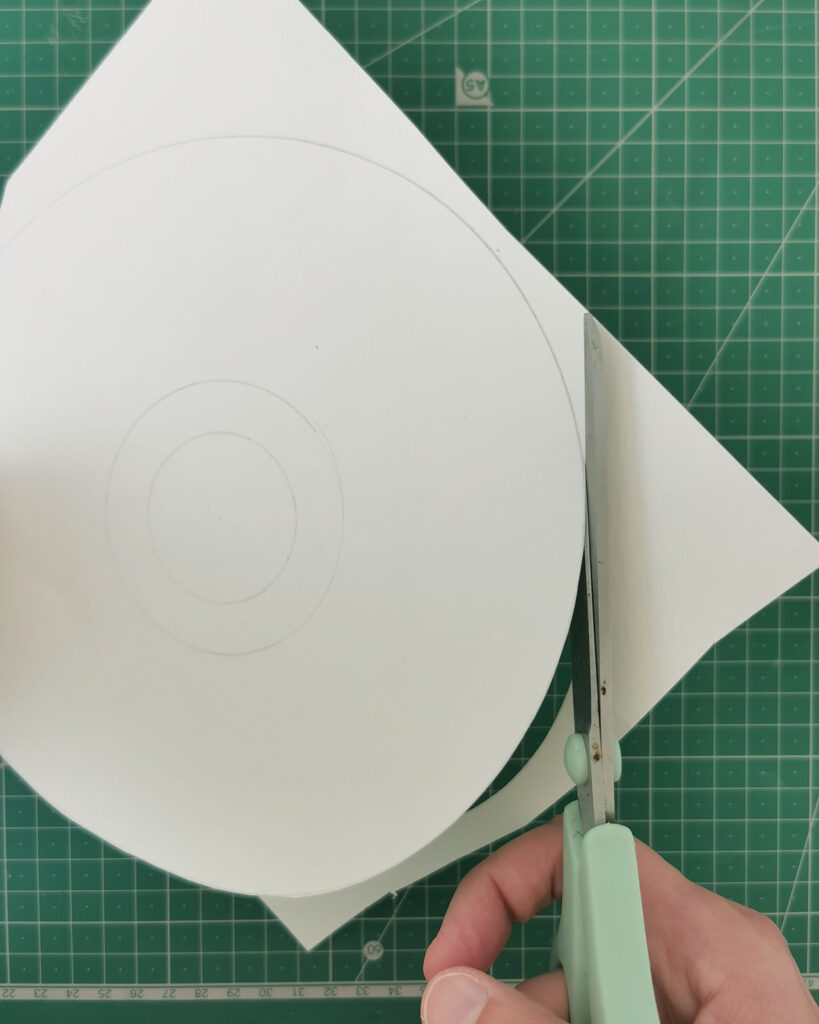
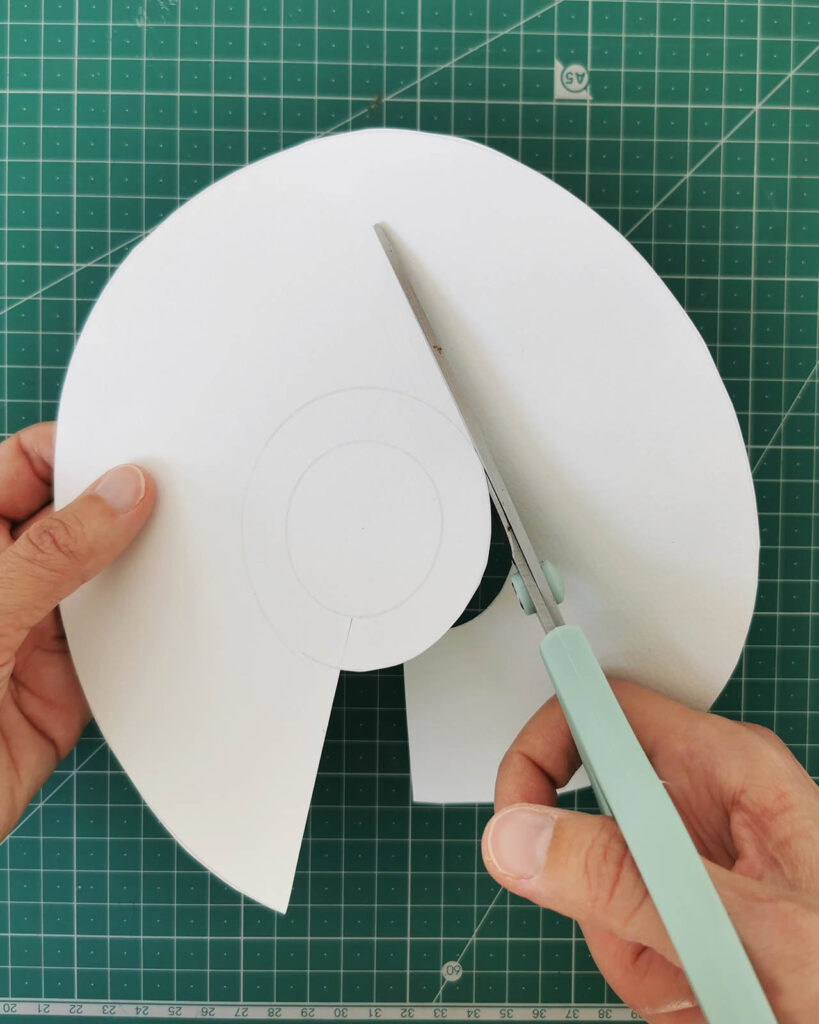
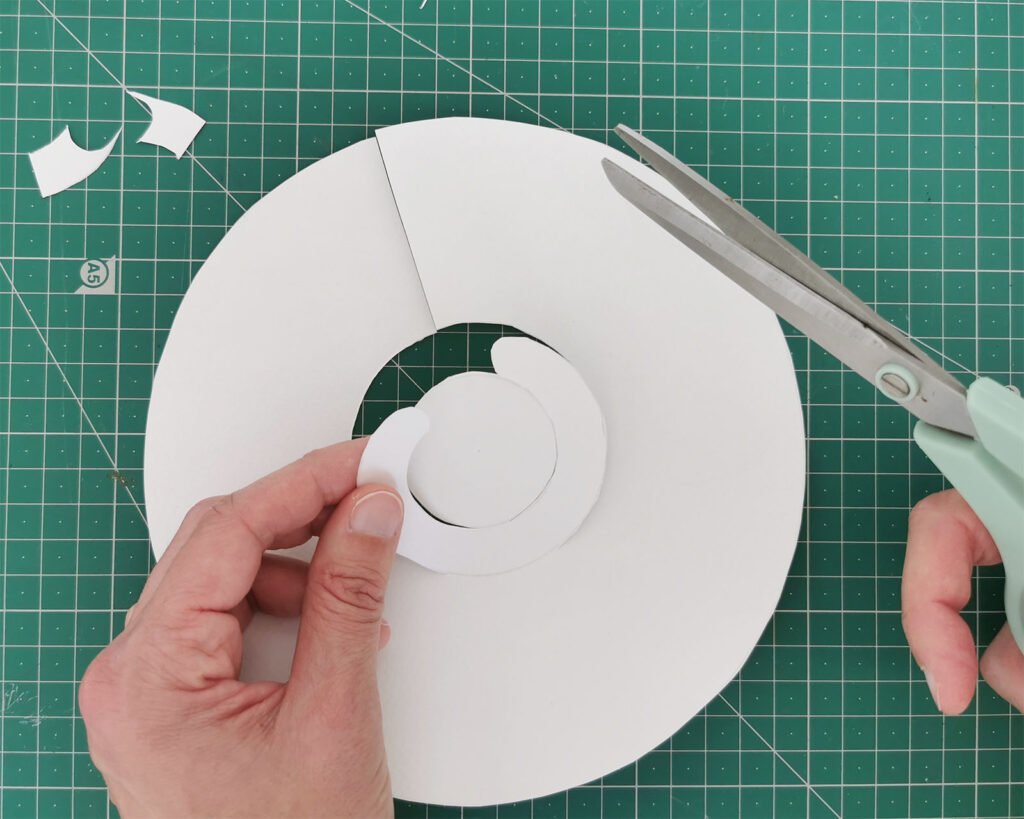
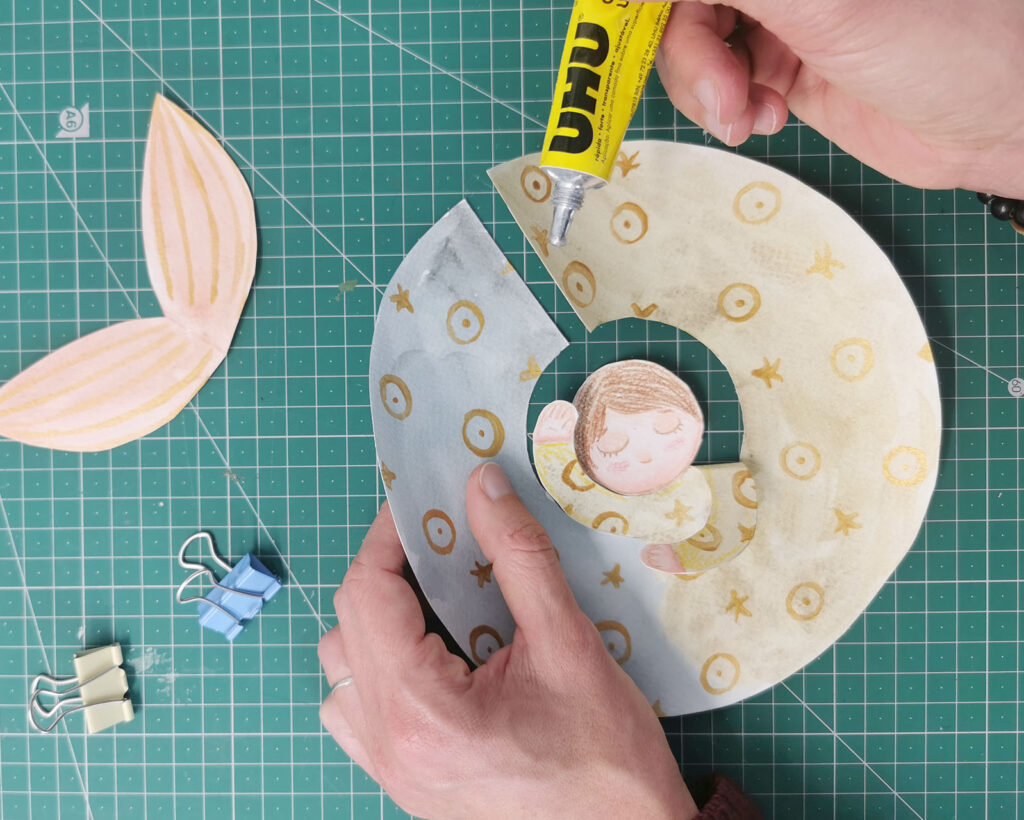
Cut out the 9.5 cm circle and, before separating the inner parts, make a single cut from the outer edge to the centre (just a straight line).
Then cut the two inner circles (head and arms), leaving about 2 cm uncut. This keeps the angel connected so it can be assembled like a little puzzle.
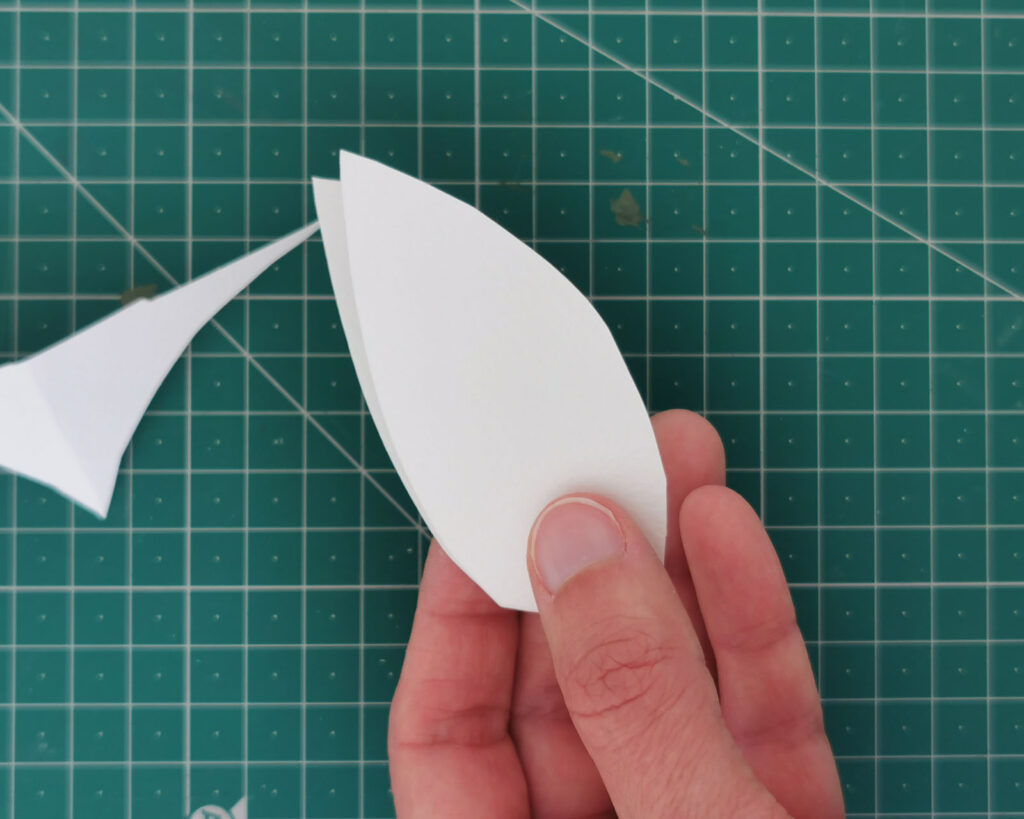
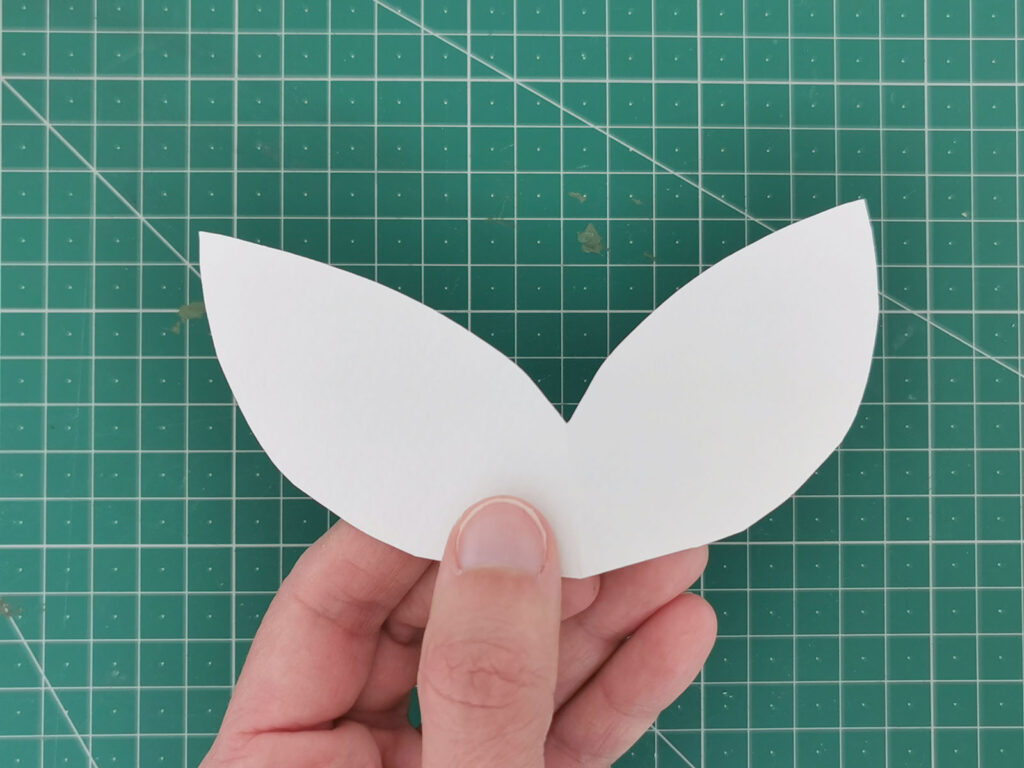
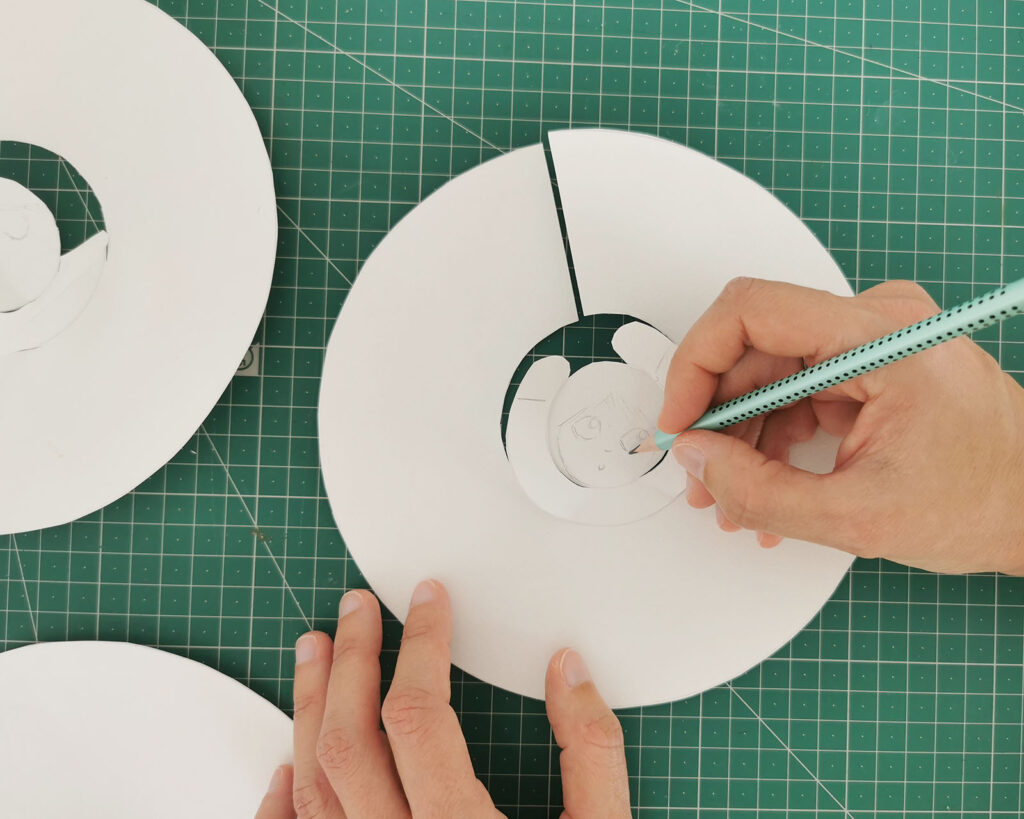
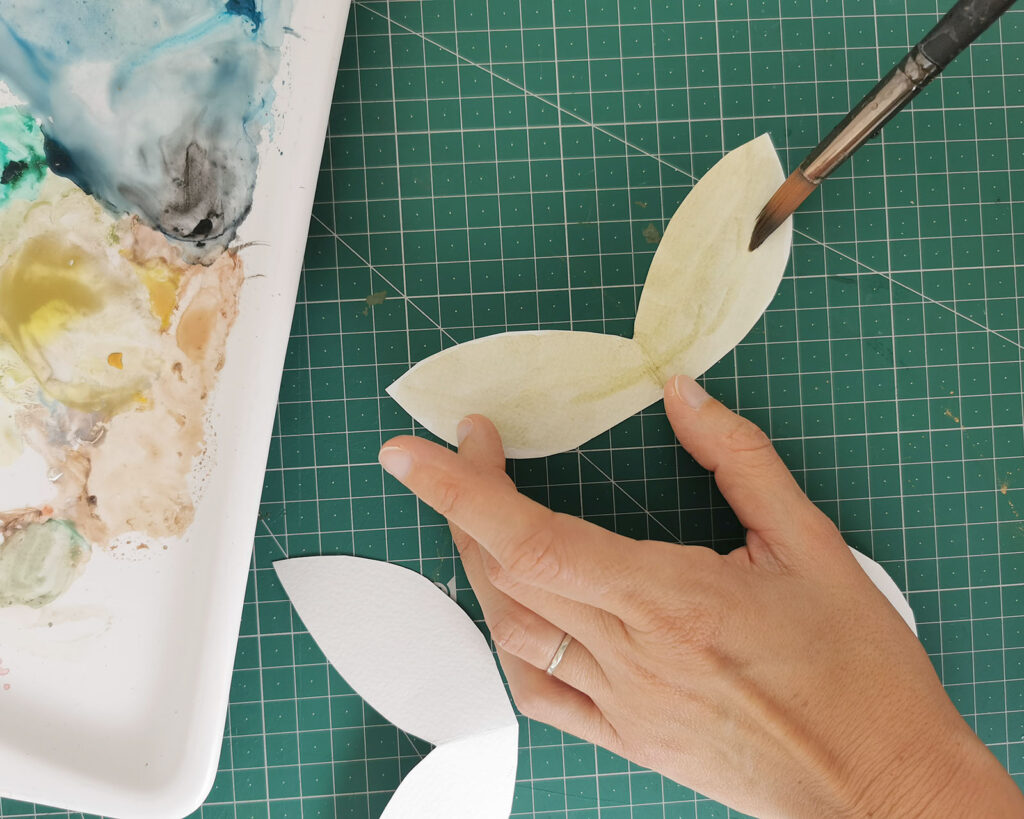
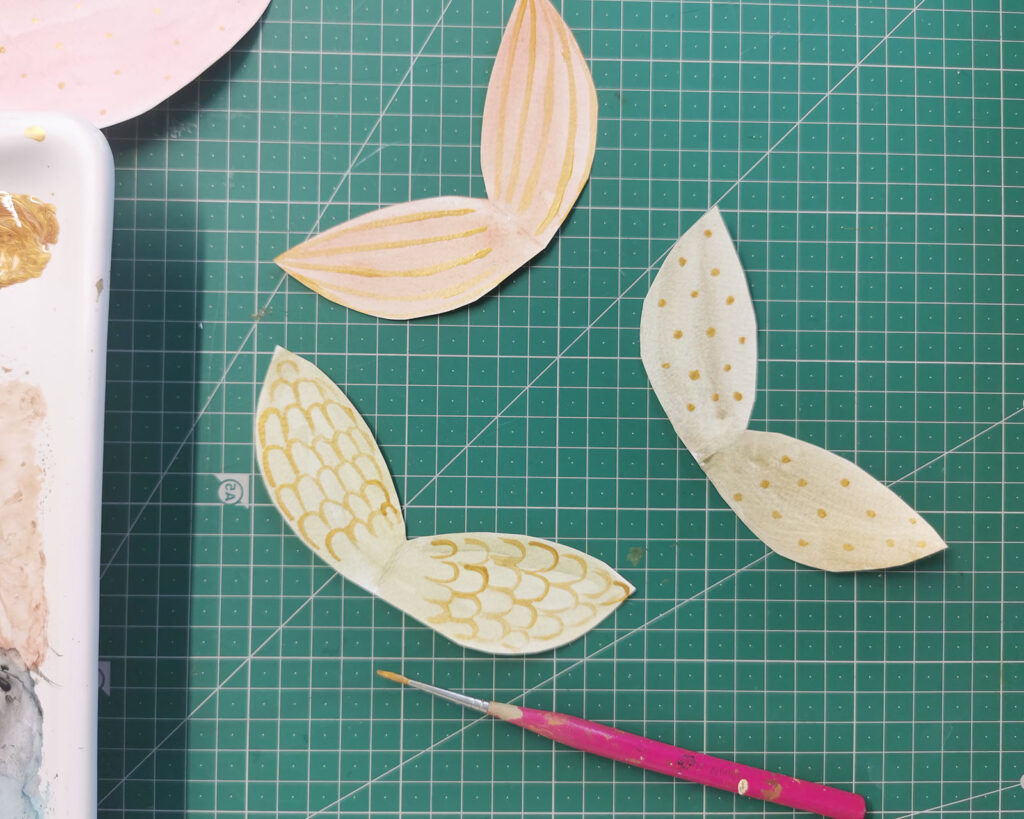
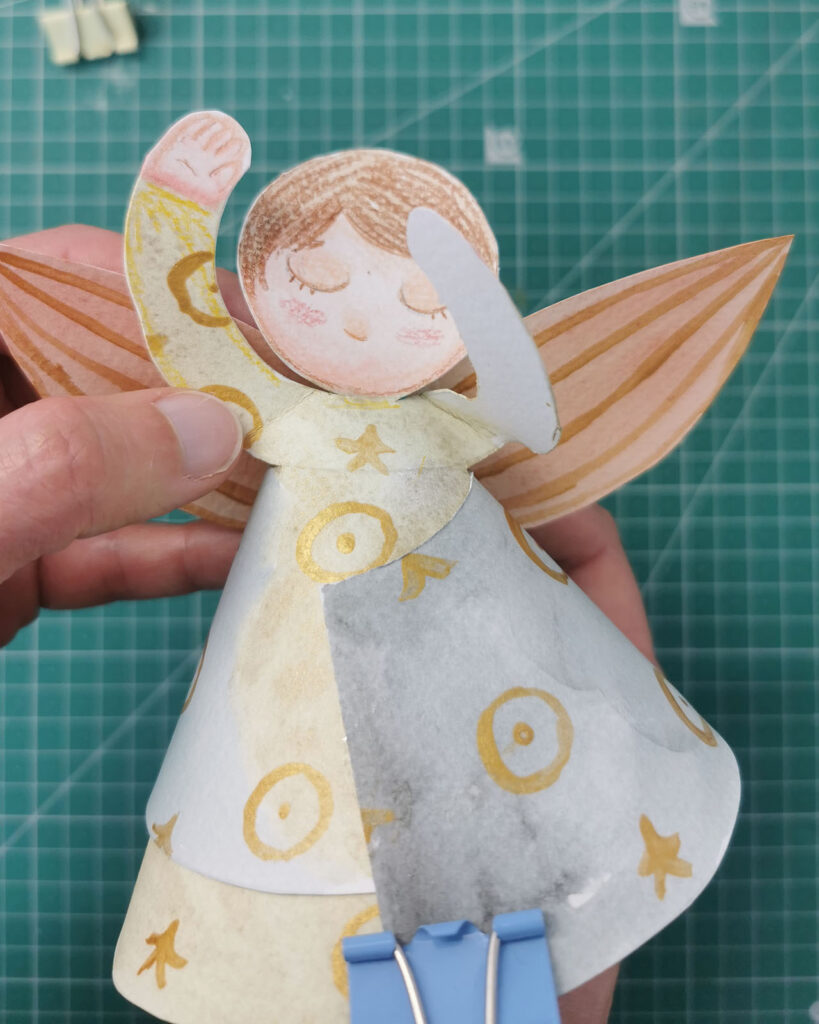
Fold a piece of paper in half. Draw a leaf-shaped outline and cut it out. When you unfold it, you’ll have a symmetrical pair of wings. You can make them larger, rounder, or more feather-like depending on the style you prefer.
Trim a small segment (around 1 cm) above the head to shorten it, creating the effect of raised or lowered arms.
Now the creative part begins!
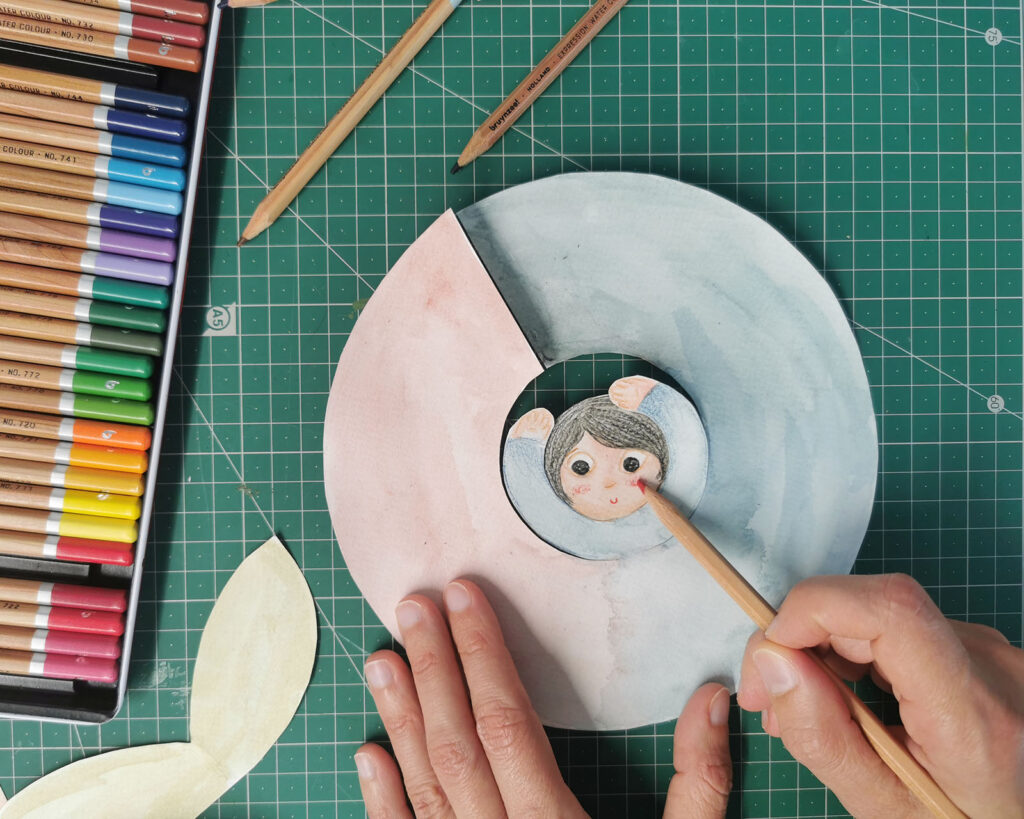
The smallest circle will be the face and hair
The medium circle will be the arms
The largest circle will be the dress
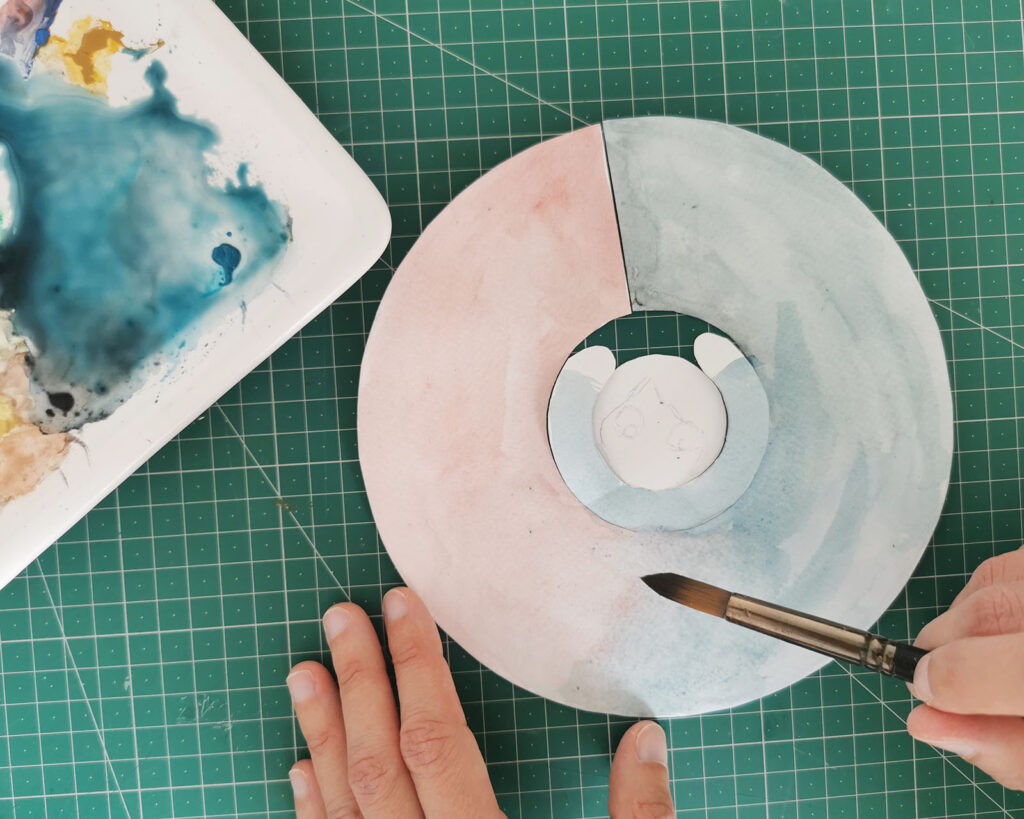
Colouring tips:
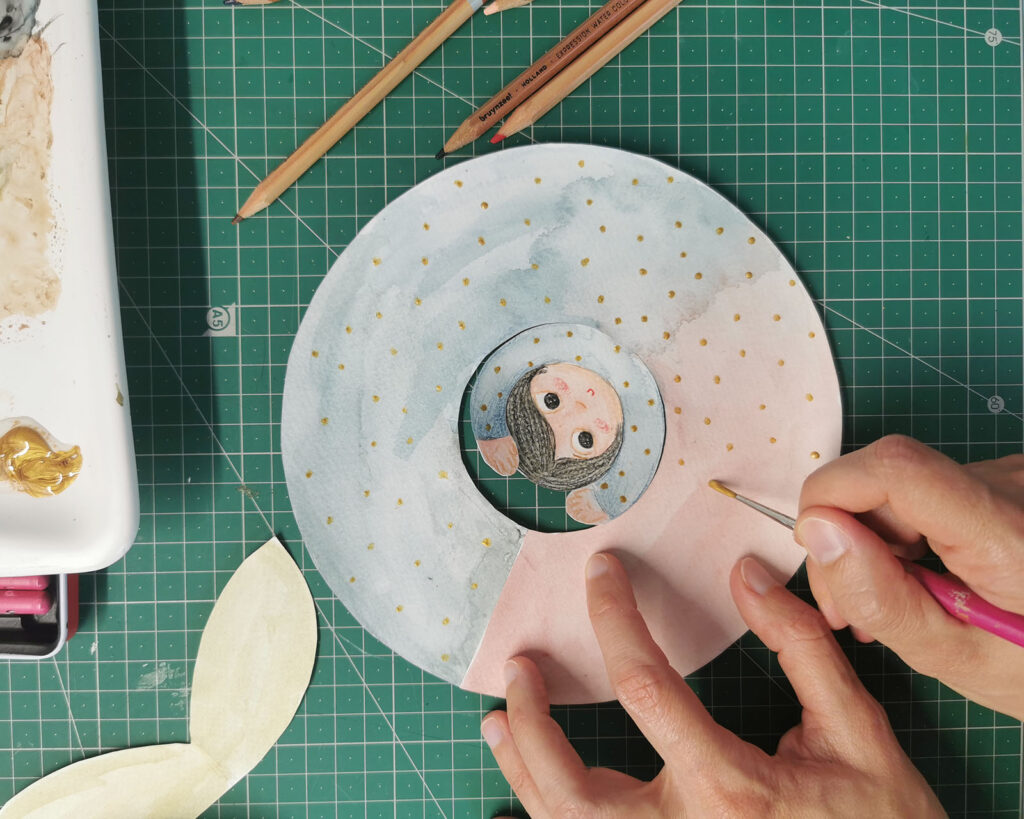
Painting half the dress in one colour and the other half in another works beautifully.
You can create soft transitions or watercolour washes between the shades for a more ethereal effect.
Before colouring the arms, decide whether they will point upwards or downwards, so you know how to place the shading.
Paint the wings too, matching the style of your angel.
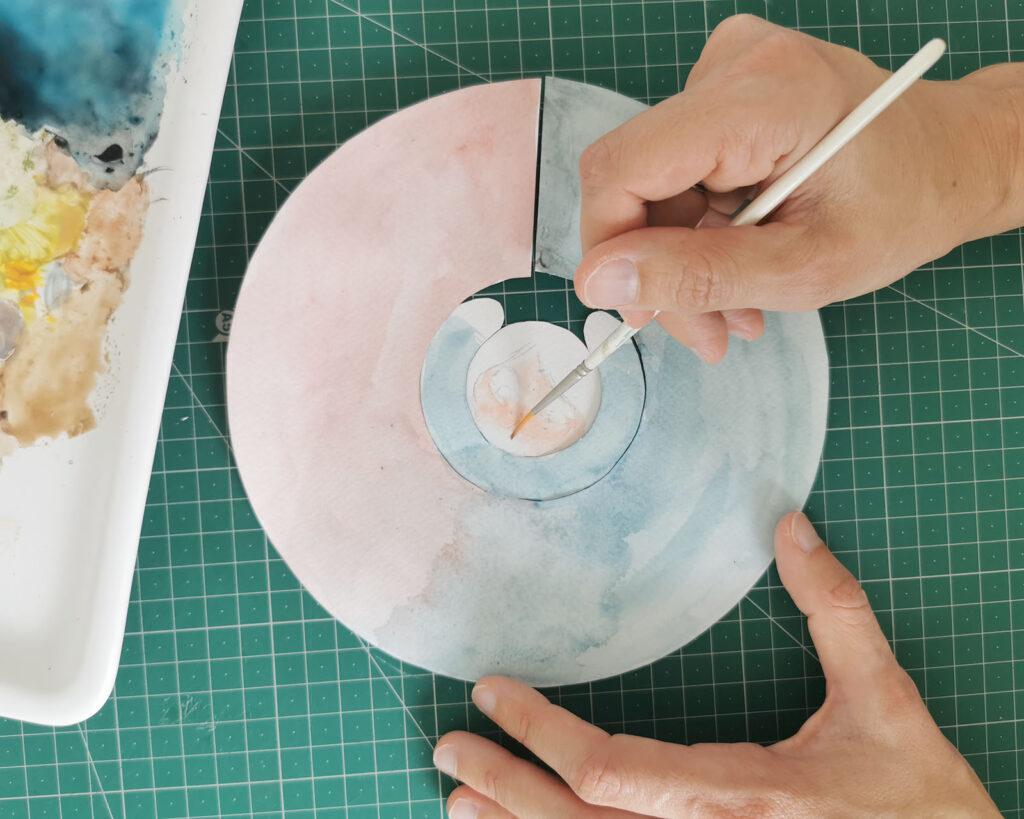
Once everything is dry, use coloured pencils or markers to add the eyes, nose, mouth, hair details, and hand outlines. These small touches bring the angel to life.
Roll the large circle to form a cone. The edge that aligns with the imaginary vertical line coming down from the head (through nose and mouth) should be glued at the front, so the dress looks like a “double layer”. Glue the back as well to reinforce the shape.
Attach the wings to the back of the head. They can face upwards (more visible) or downwards (more traditional).
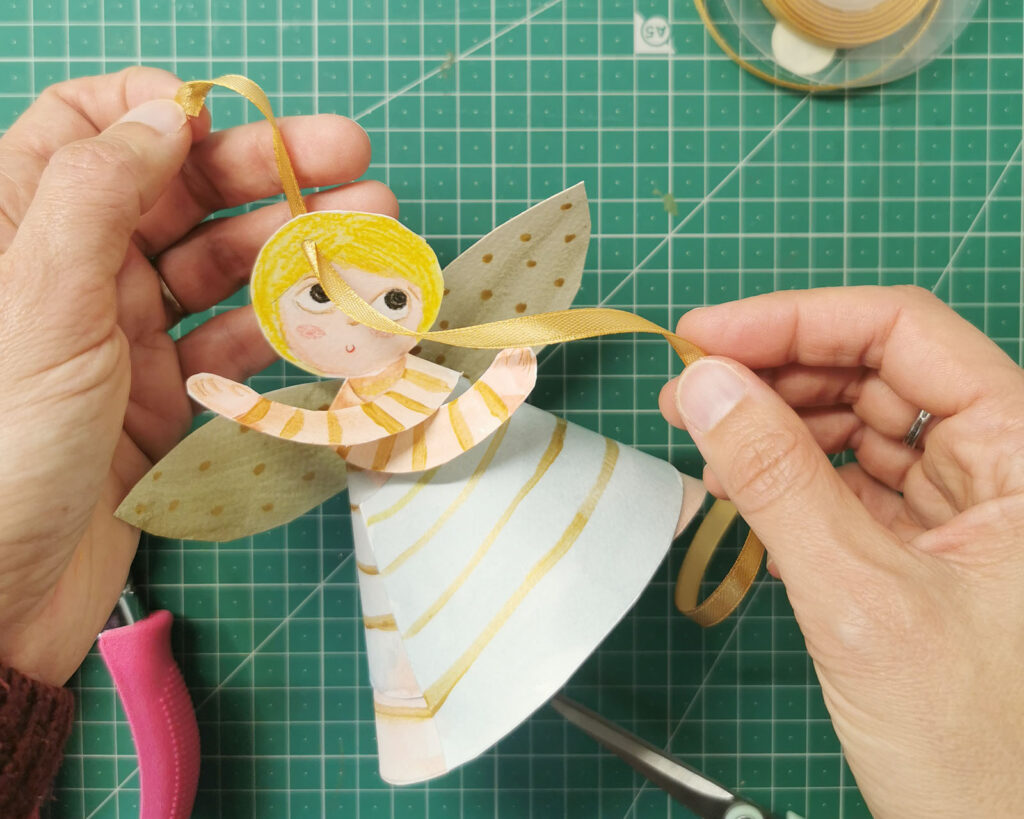
Use a hole punch to make a small hole at the top of the head. Thread the ribbon or string through and tie a knot.
Your paper angel is ready to hang!
Perfect for the Christmas tree, as a handmade gift, or even in smaller versions to decorate presents. There’s no better time than Christmas for these cosy creative projects as a family!🎄🌟
Here is the Instagram reel where I share the full step-by-step. Click here.